Table of Contents Overview
Table of Contents
Overview
This document outlines the identity provider specific steps required to configure an Entra ID Application for the Cirrus Enterprise Bridge. For the full process, visit Getting Started with Cirrus Bridge. You will follow each of these steps for each new application that you add.
To complete these steps, you will need the information for at least the default profile that you created from the Authentication Profiles for Cirrus Bridge page.
Additionally, each unique authentication profile requires its own Entra ID application. An authentication profile includes the NameID format and value, set of attributes, and set of signing and encryption settings. A typical implementation will include the default profile(s) for each protocol, and then one or more additional profiles if required by the service providers. Your Cirrus Implementation Lead will work with you to develop these additional profiles and provide support for configuration. Entra ID allows you to add multiple Entity IDs and/or Entity Categories to a single application.
Add Application
Step 1 - Add Enterprise Application
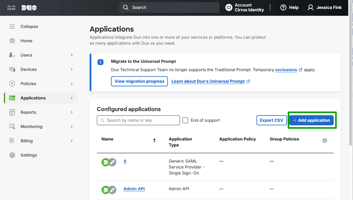
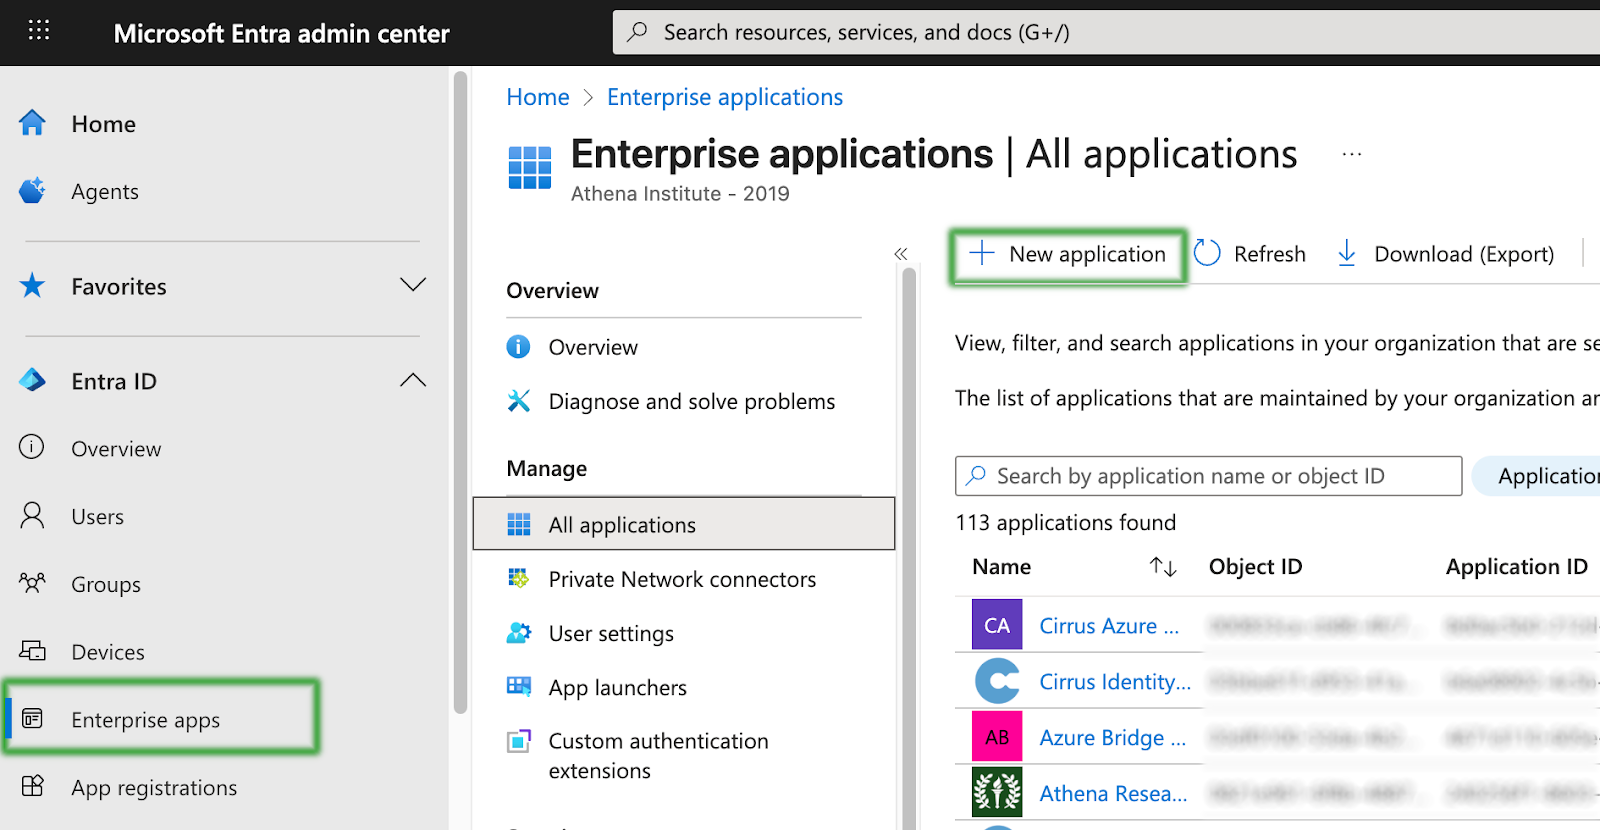
Log into the Entra ID portal https://entra.microsoft.com, click the “Enterprise applications” left menu item, and then click “New application”.
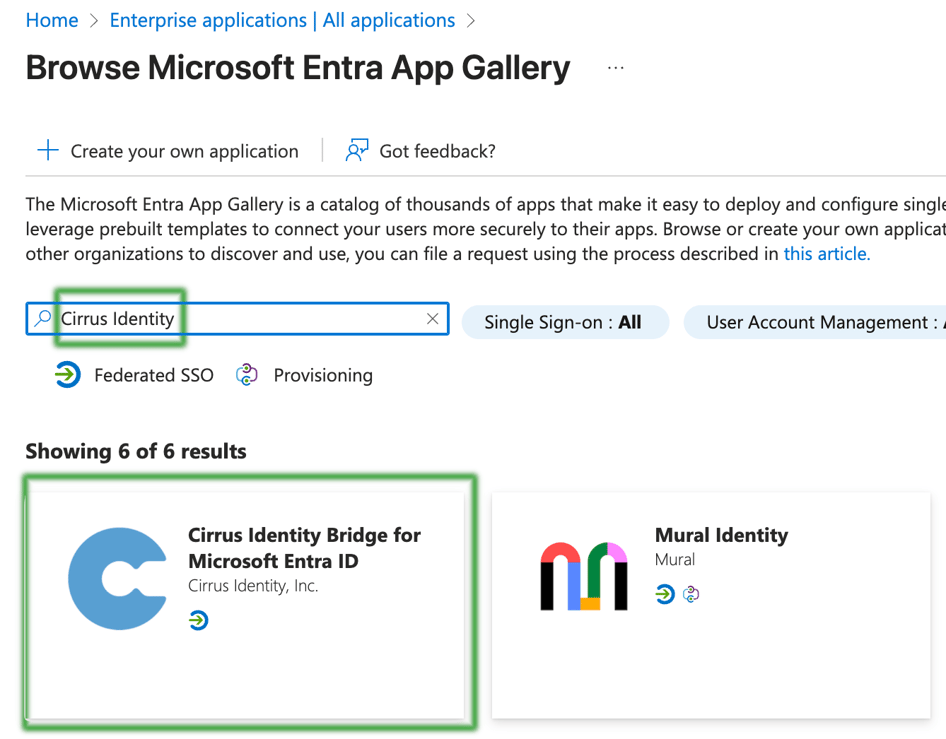
In the search box, search for “Cirrus Identity” and select the “Cirrus Identity Bridge for Microsoft Entra ID” gallery app.
Provide a name for your application. For the default application, we recommend “Cirrus Default Bridge”. For other InCommon applications, select a name that fits your naming conventions and the purpose of the application.

Step 2 - Application Visibility and Assignment
By default Cirrus recommends that you set Assignment Required? and Application Visibility? to No.
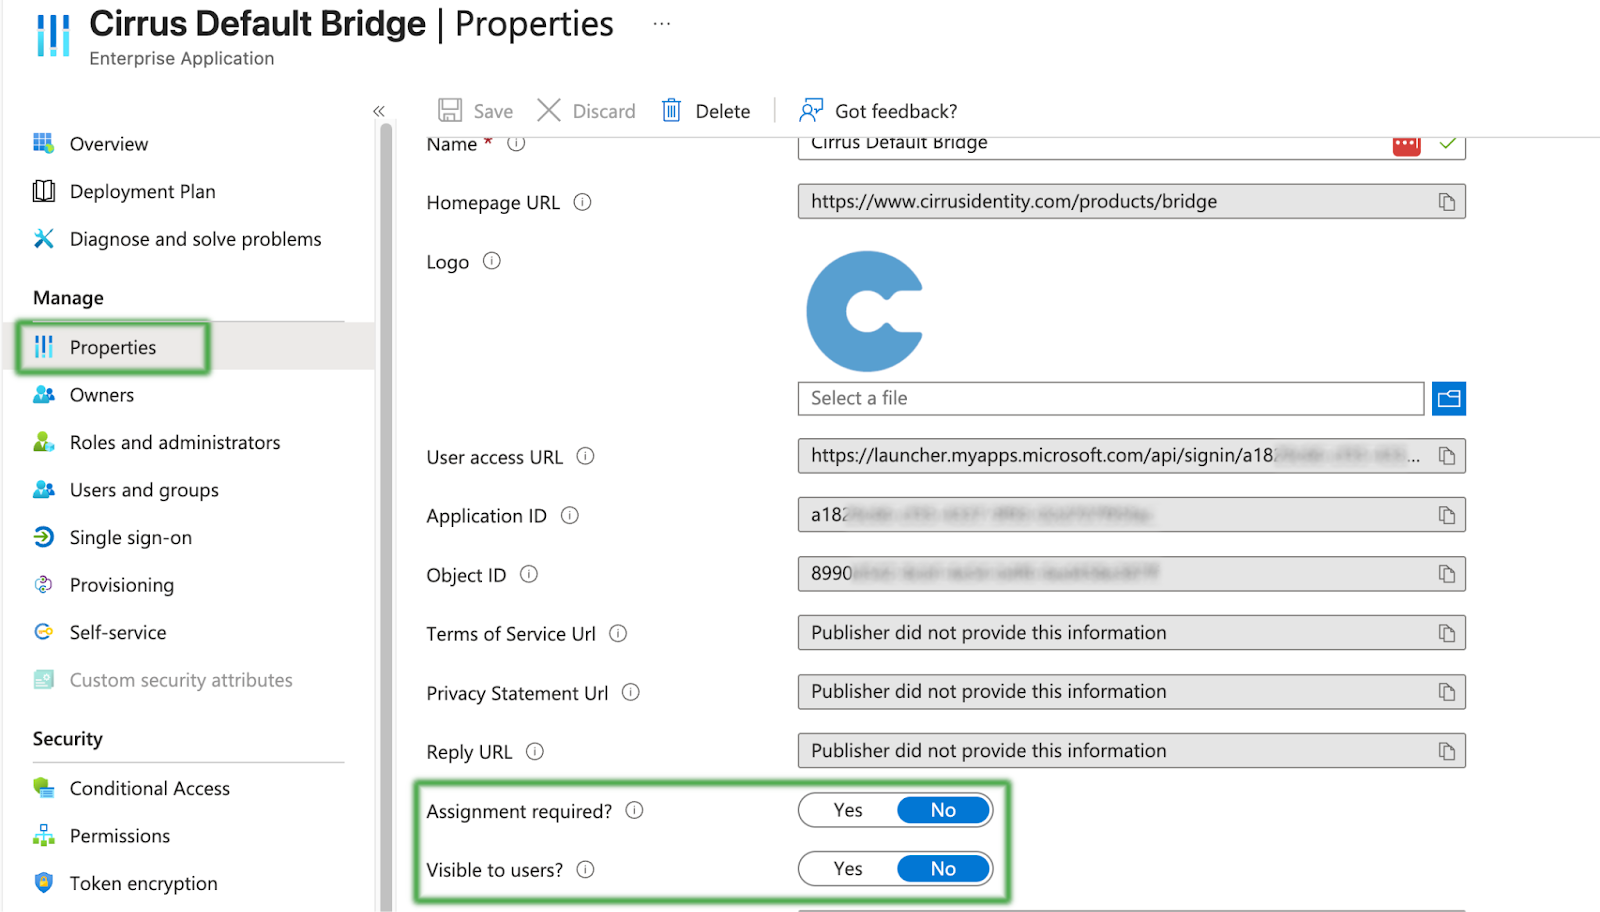
However, if your institution’s security settings require assignment, then please go ahead and do so by setting Assignment Required? to Yes and adding the appropriate settings under ‘Users and Groups’.
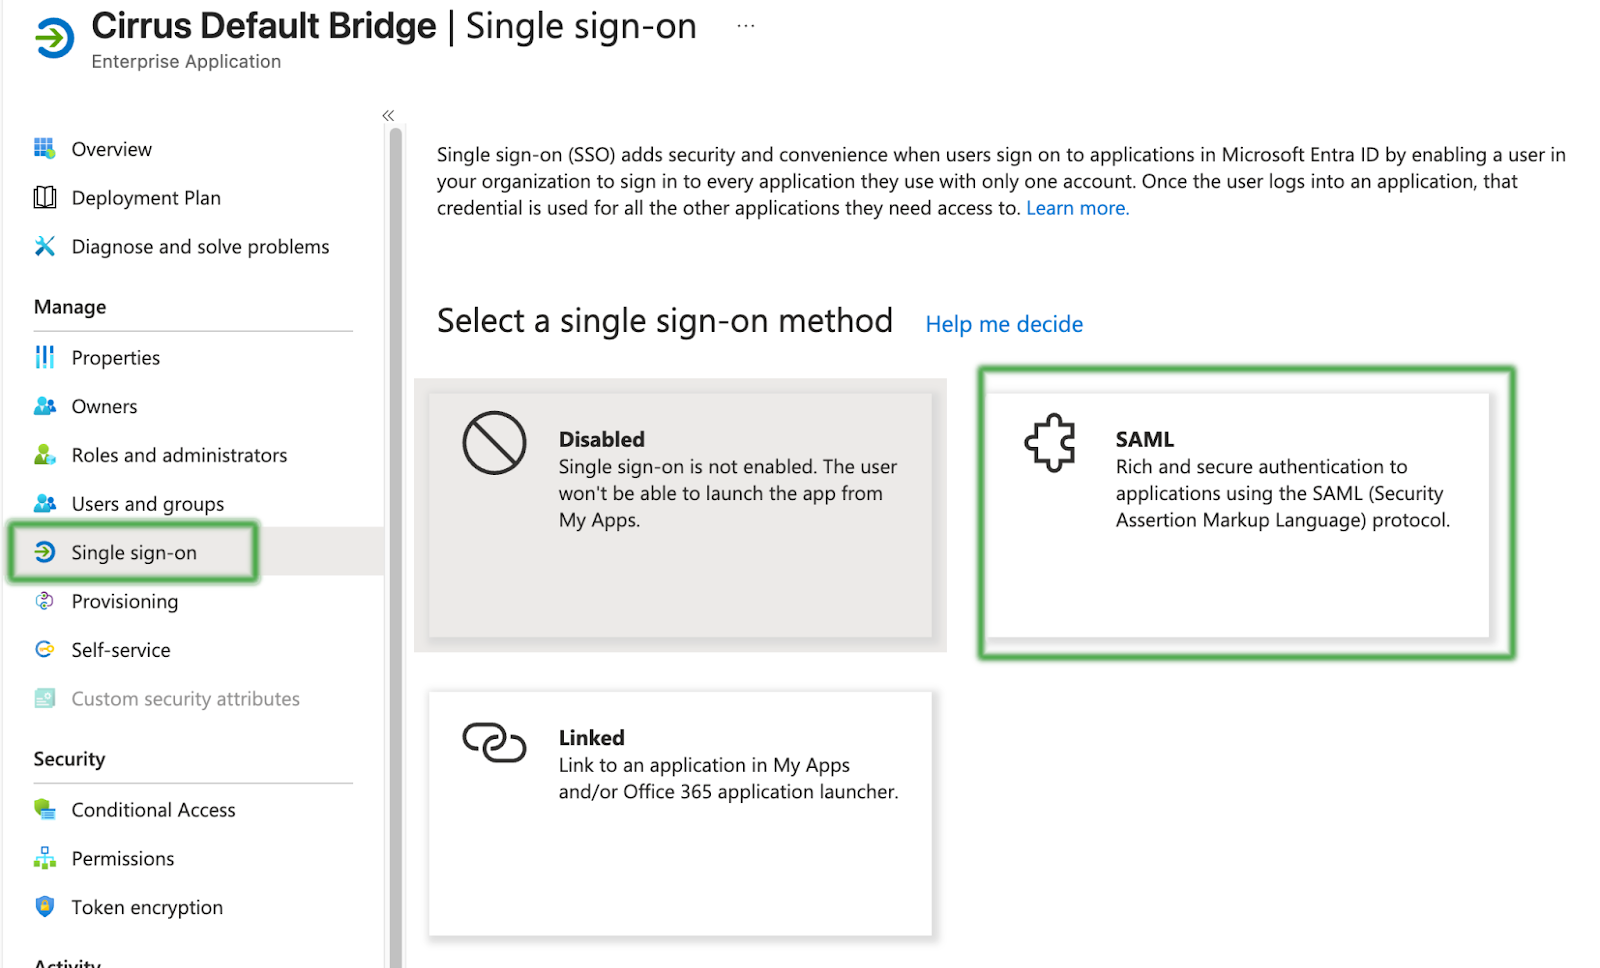
Step 3 - Set Up Single Sign-On
Next, select ‘Single Sign-On’ from the left menu, and then select the SAML option.
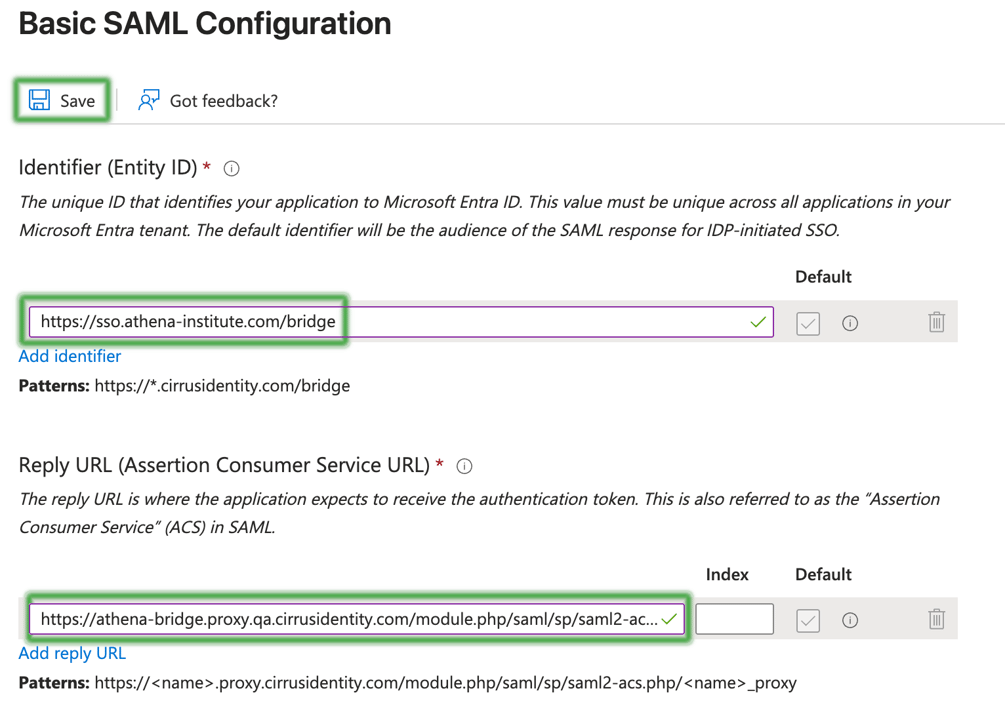
First, you will edit the Basic SAML Configuration.
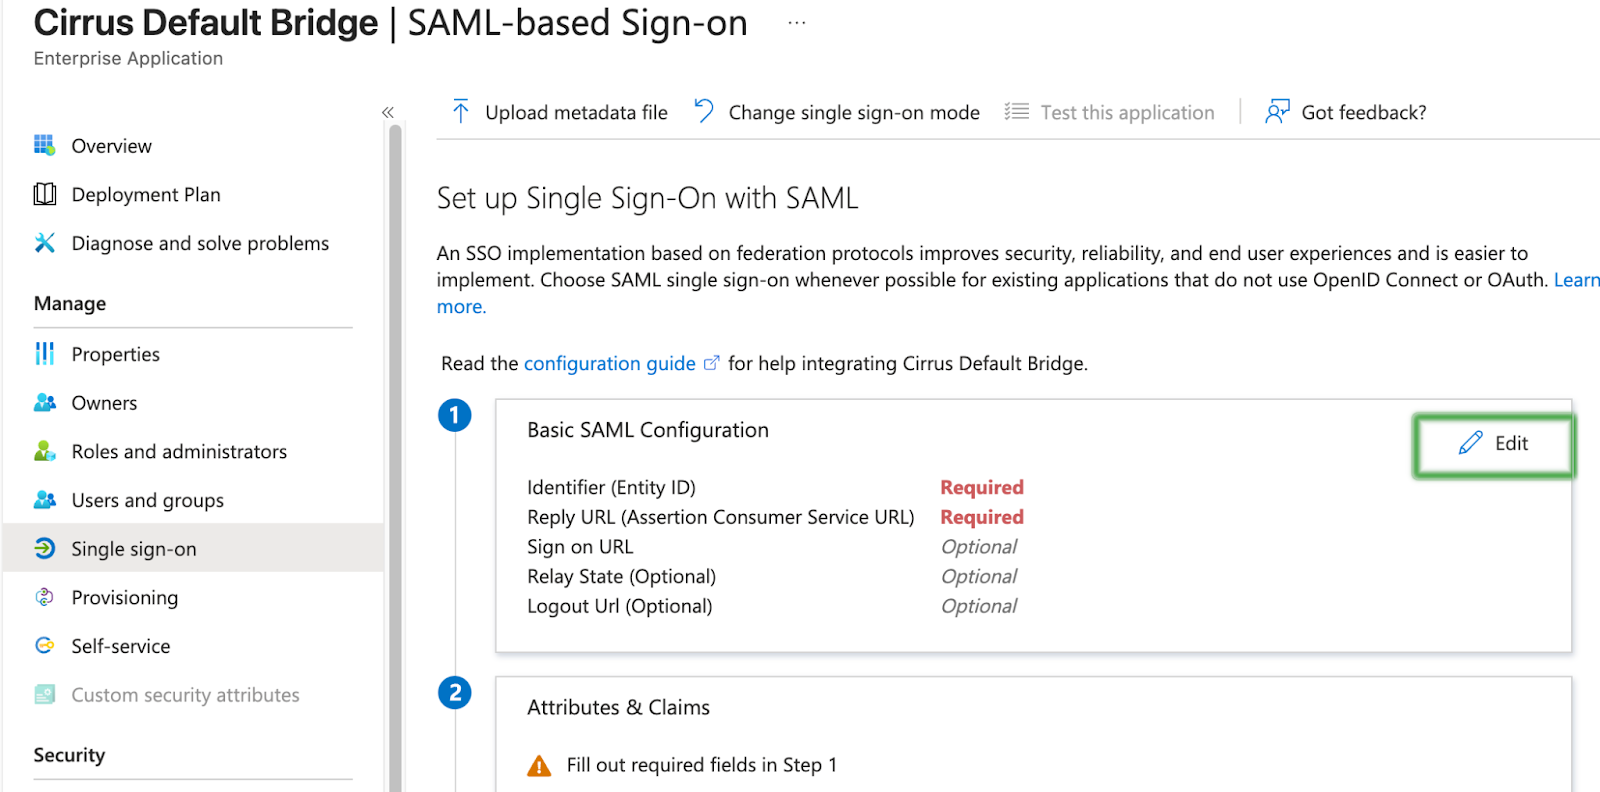
Enter the Identifier (Entity ID) and Reply URL (Assertions Consumer Service URL) as provided by your Implementation Lead, Save, and Close.
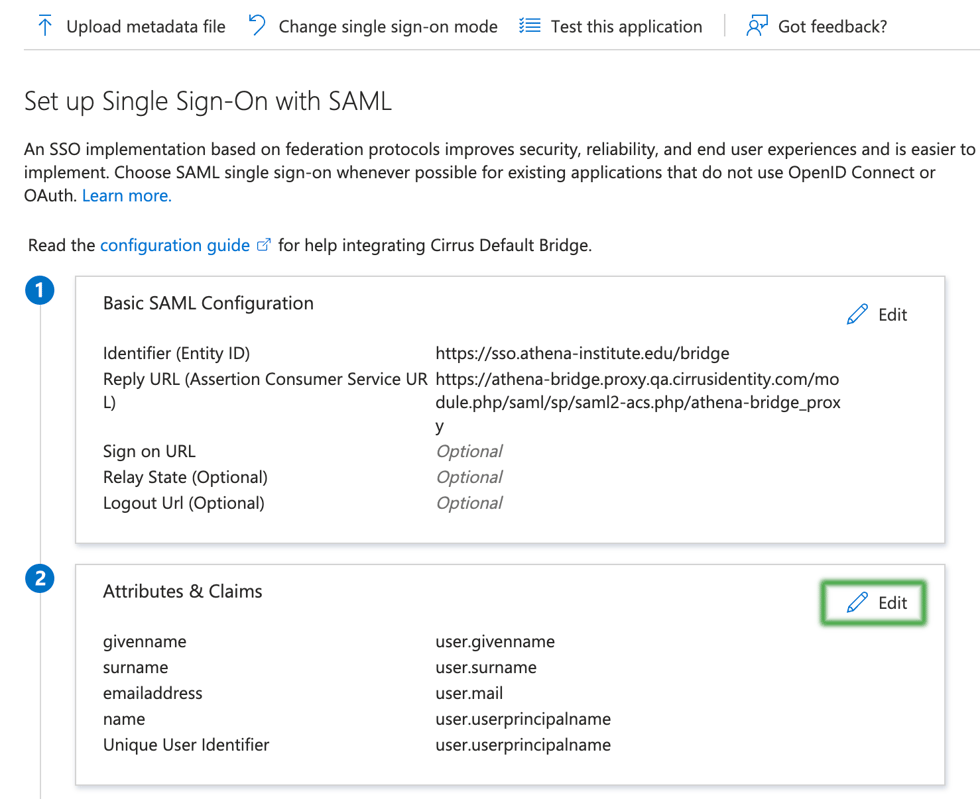
Step 4 - Configure Attributes
Next, the attributes will be configured. Entra ID calls them claims. Entra ID also allows you to perform transformations to your attributes. Please refer to the list you created from the Authentication Profiles for Cirrus Bridge page to configure these attributes.
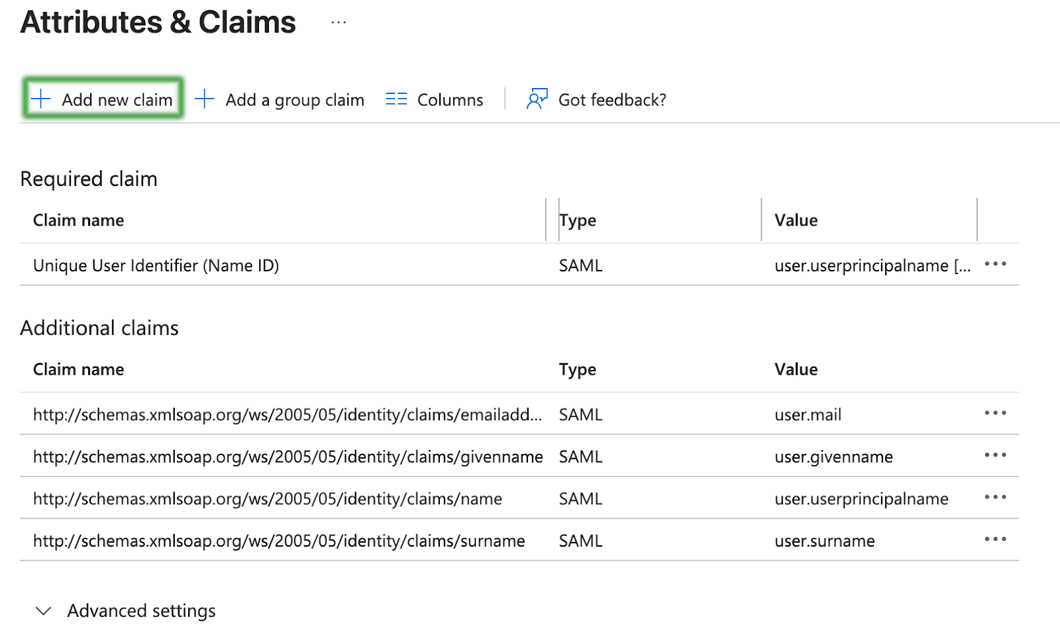
First, navigate to the claims area.
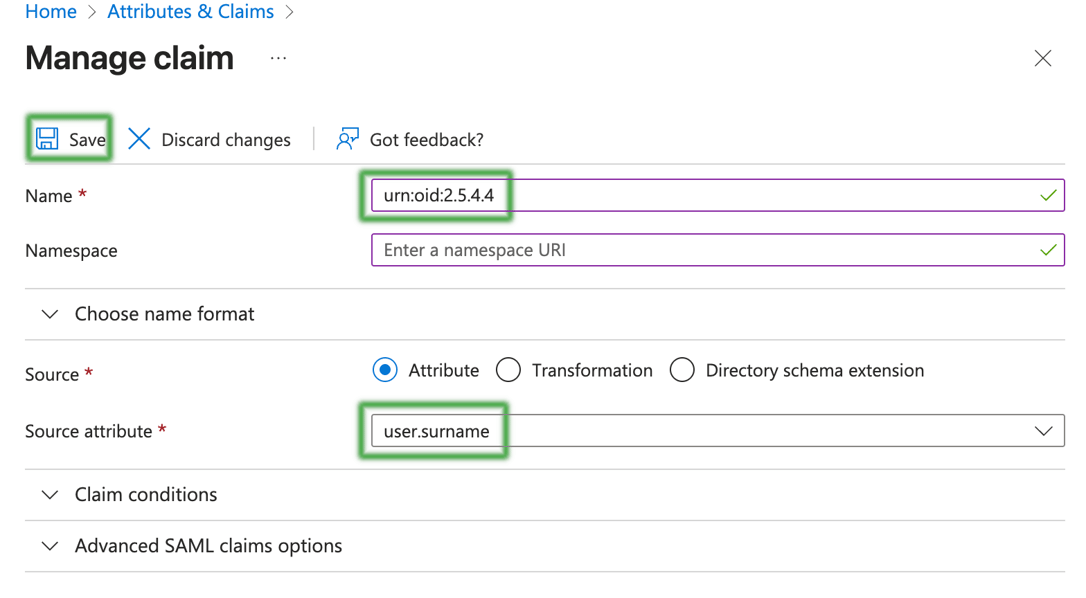
Use the attribute profile you built to configure your list of attributes. The general process for adding an attribute will look like the screens below.
Each screen will end up looking like the following, but with different values for Name and Source Attribute.
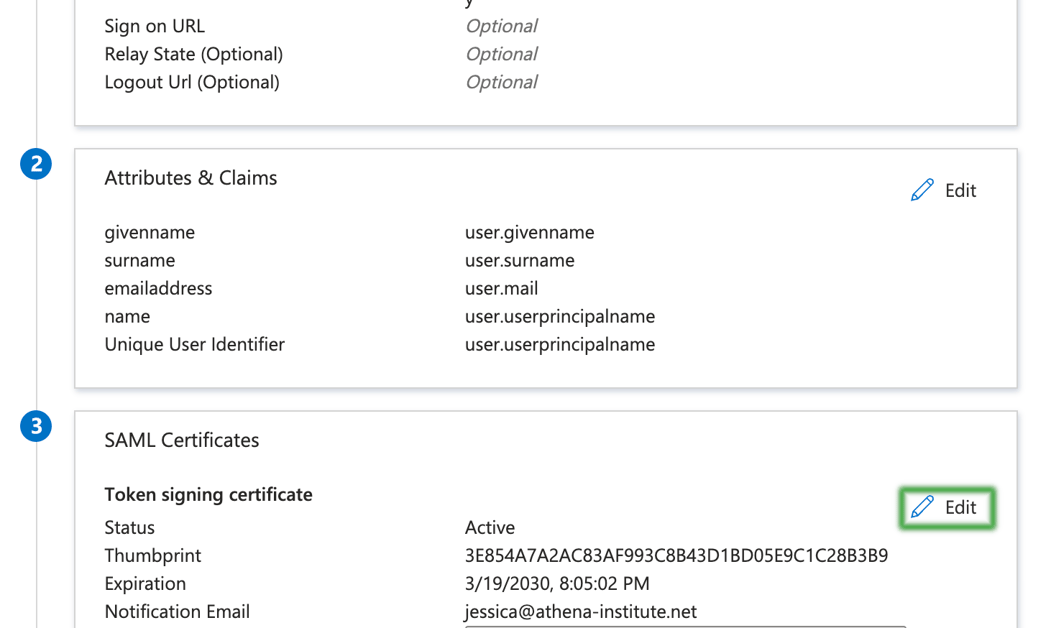
When you are done, the Attribute list will look something like the following. You may have additional attributes that you have added to the profile so it would differ in that way.

Now, close this screen and return to the previous one.
Step 5 - MFA
If you are using Entra ID MFA, then the Cirrus Bridge will automatically assert the REFEDS MFA authncontext to downstream service providers.
If you are using another source for MFA such as Duo, you may need to manually assert MFA since Entra ID may not signal to the Bridge that MFA was performed for users. In that case, please add an additional attribute with the following Name and Value, and note that by doing so you are asserting that all users that use this application MFA performed MFA.
Name: cirrus.rule.authnContext
Value: https://refeds.org/profile/mfa
Step 6 - Signing Settings
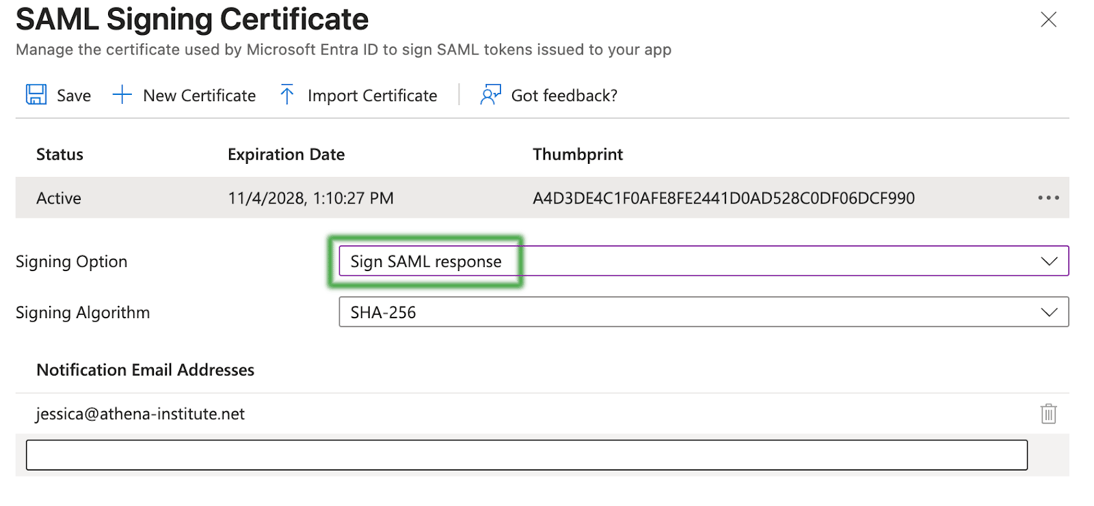
Next you will update the signing and encryption settings. First select the Edit icon.
Entra ID signs both the SAML response and assertion. Some applications only want one or the other signed. Our recommendation for the default application is to only sign the response. This configuration will match Shibboleth’s default behavior.
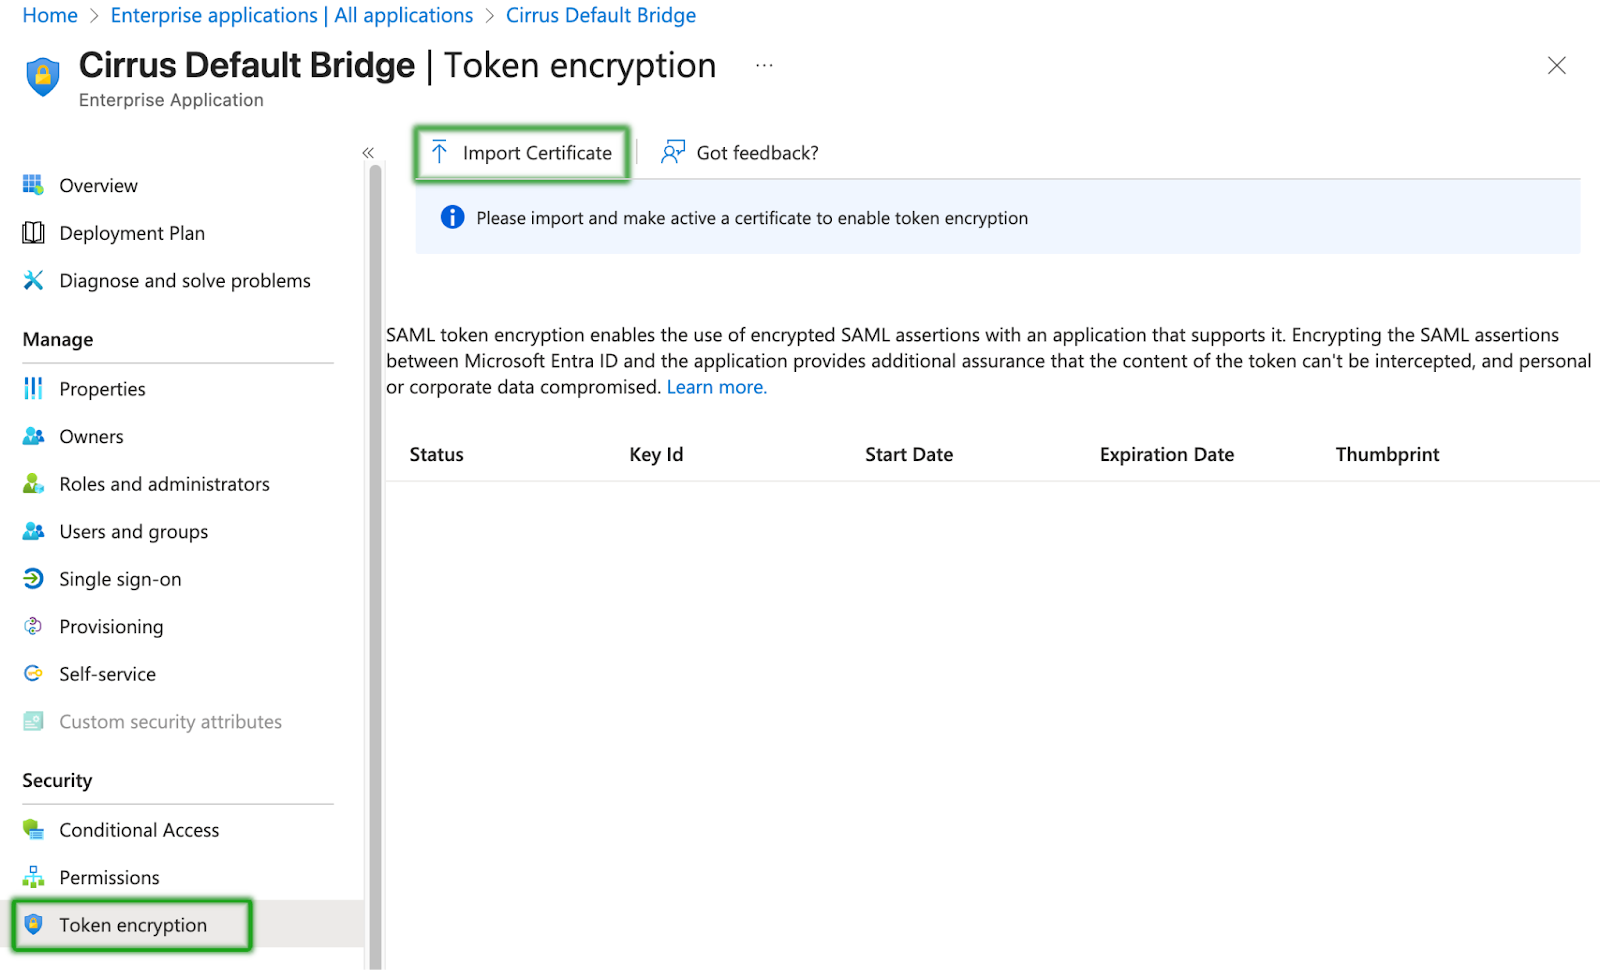
Step 7 - Encryption Settings (optional)
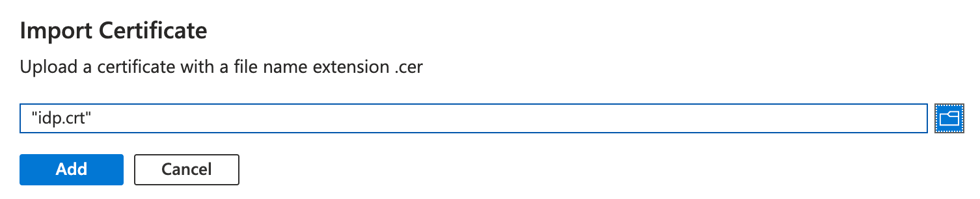
Customers moving from Shibboleth likely have a default policy to encrypt all assertions. To enable this, navigate to the “Token Encryption” side menu, import the certificate for the Cirrus Bridge, and then activate the certificate. It can take several minutes for Azure AD to start encrypting assertions.
Testing
Now that your Enterprise Bridge is configured within Entra ID, please return to the Testing section of the Getting Started documentation to test your Bridge.